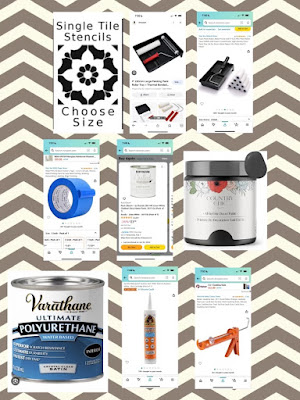
You will need:
1. Correct-sized stencil of your choice
2. Thick painter's tape (2in)
3. Chalk paint (for base)
4. Chalk paint (for top)
5. Large roller and pan (for base)
6. Small foam roller and pan (for top)
7. Caulk
8. Caulking gun
9. Water-based sealer (Polyurethane)
10. Time and patience!
Instructions:
1. Clean floors thoroughly making sure it is completely free of dust, dirt and hair.
2. Tape all wall bases and around bathtub and toilet.
3. Using large roller, apply 1 coat of base paint. Allow to dry.
4. Apply second coat. Allow to dry.
5. Tape stencil to the floor using blue painter's tape.
6. Carefully pour top paint into tray. Get some excess paint off by rolling on tray. LIGHTLY roll over the stencil using the small foam rollers. Do NOT press hard or paint will seep under the stencil and ruin your design. Make sure stencil has full coverage but is not drippy. The foam roller will help with this!
7. Continue this step until all tiles are completed by slowly removing stencil and taping it to the next tile. Start on the largest tiles first and work your way backward towards the door.
8. When all large tiles are complete, cut stencil starting with the second largest tiles and work your way to the smallest tiles (behind and around the toilet,sink, etc.)
9. Allow all paint to dry completely (It dries very fast!)
10. Once complete, use a small paint brush to fix any minor mistakes and let dry. Do not get floor wet!
11. Remove blue tape from walls.
12. Seal and caulk all bases of floors and around the toilet and bathtub using caulk and caulking gun.
13. Allow caulk to dry.
14. Apply one coat of polyurethane sealer working your way from front to back. I used a small foam roller. Let dry for about an hour.
15. Apply 2 more coats and let dry in between coats.
*The sealer will allow you to clean your floor as normal. Water and floor cleaner will not damage it!
How does it hold up?
This is another bathroom I did 5 years ago. You'll see that a few spots need touching up but it's held up very well!
Feel free to comment with any questions.
Enjoy your beautiful new floor!


Comments
Post a Comment